Web Service (Yaler) with Arduino
Yaler:
최근 많은 Cloud Service들이 Client들이 Device에 접속하기 위해 Device에 바로 접속하는 것이 아니고 이미 등록되어 있는 Server에 접속하여 Device를 제어 및 모니터링 하는 Service들이 다양하게 존재한다. 이러한 경우 Server는 보안 및 네트워크 구성이 다양하며, Device의 경우 Light weight한 구현을 할 수 있고, Clinet도 물론 편리한 UI, Visulaztion등의 이유로 많은 장점을 갖는다.
이번 Posting에서는 Cloud service중 Yaler를 통해 Cloud Service를 경험해보자. ㅋㅋ
Yaler는 embedded system의 접근을 위해 relay infrastructure을 제공한다. relay infrastructure는 control, manage, secure등을 보장한다.
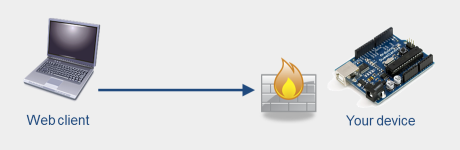
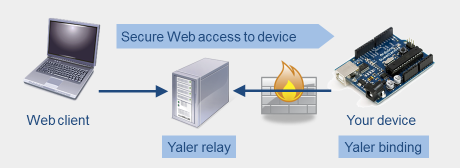
아리의 두그림은 yaler.net에서 relay infrastructure를 설명하는 자료이다. 위의 그림(a)은 Device를 NAT/Farewell 하위에 네트워크를 구성한 경우이며 이때에는 Web client가 Device에 접근하기 위해 Device의 정보이외에도 Network상에서 보안관련 정보나 NAT의 설정등의 정보 및 설정이필요하다. IoT시대에 많은 Device등을 고려한다면 Device정보을 비롯한 접근을 위한 정보까지 관리하는 것은 그렇게 쉽지는 않을 것으로 생각되며Yaler는 그림(b)의 relay infrastructure을 구성하여 Yaler relay라고 불리는 Server를 통해 Device를 접속할 수 있다. Device를 Yaler relay에 binding하여 Device에 대응되는 Relay Host, Relay Domain, Secret Key를 할당받게된다. Web Client 는 이를 이용하여 Device가 아닌 Yaler relay에 접속하게 되며 Yaler relay는 Binding 정보를 이용하여 Device에 접속하는 구조이다.
아래의 Yaler이해하기 자료의 slideshare의 자료에서는 Publish HTTP라는 단어로 좀 더 추체적으로 Yaler에 대해 설명되어 있습니다.
Do Yaler:
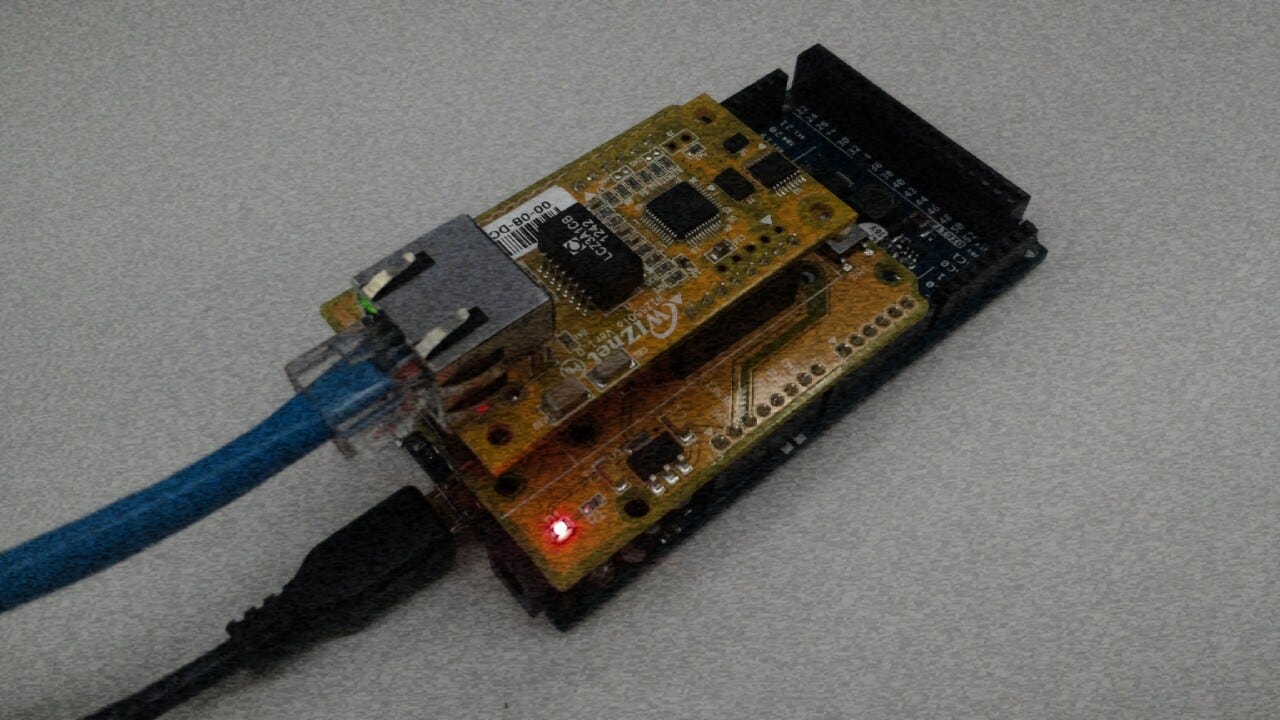
Yaler를 체험하기 위해 필요한 Hardware는 Arduino Board와 Ethernet Shield이다. 그리고 Yaler relay는 yaler.net를 사용하였다
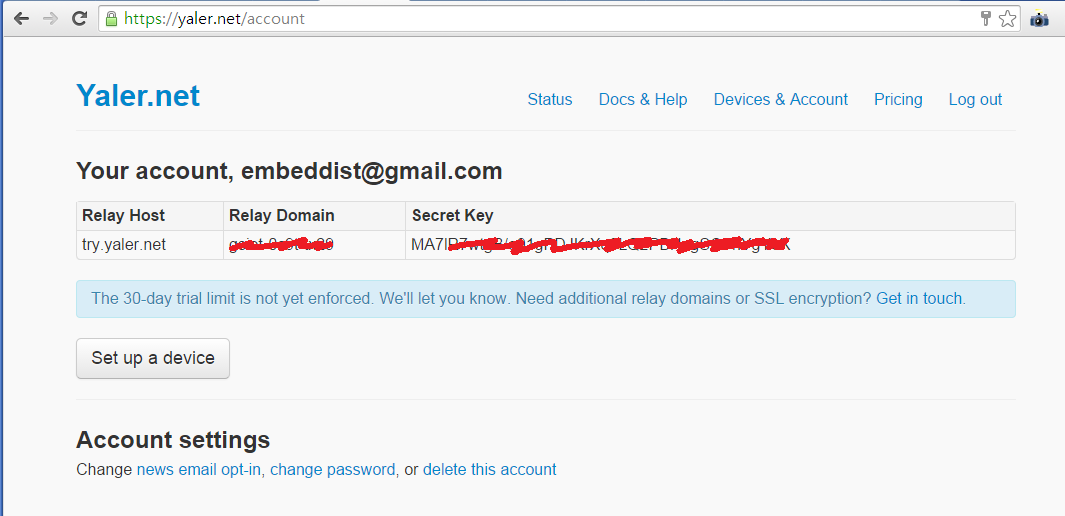
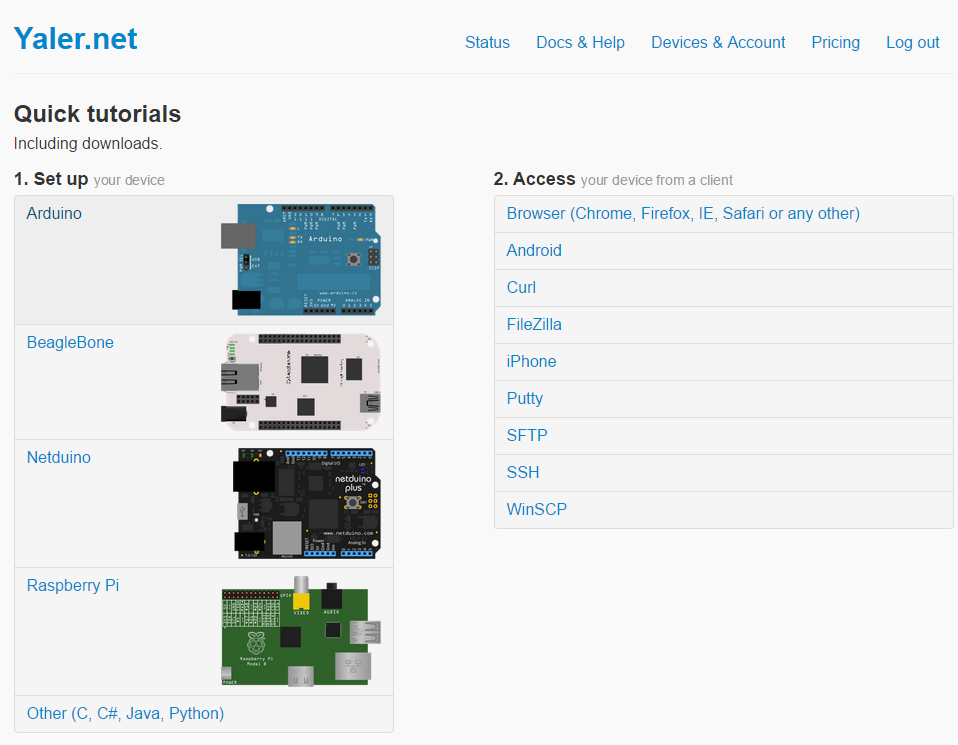
Make account on yaler.net:
무료계정은 한달간 이용할 수 있다. 계정을 만드는 동시에 아래와 같이 Relay Host, Relay Domain, Secret Key을 할당 받는다.
위의 그림에서 “set up a device” 거침없이 클릭!
아래서 Arduino선택!
위의 단계에서 Arduino를 클릭하면 아래와 같은 페이지가 나온다. 하기의 페이지에 Yaler Lib의 설치 예제까지 나와 있다. 일단 “YalerEthernetServer.zip”를 다운받고 IDE.1.5.7인경우 “C:\Program Files\Arduino\libraries”밑에 압축을 푼다. 그럼 라이브러리 준비 끝.
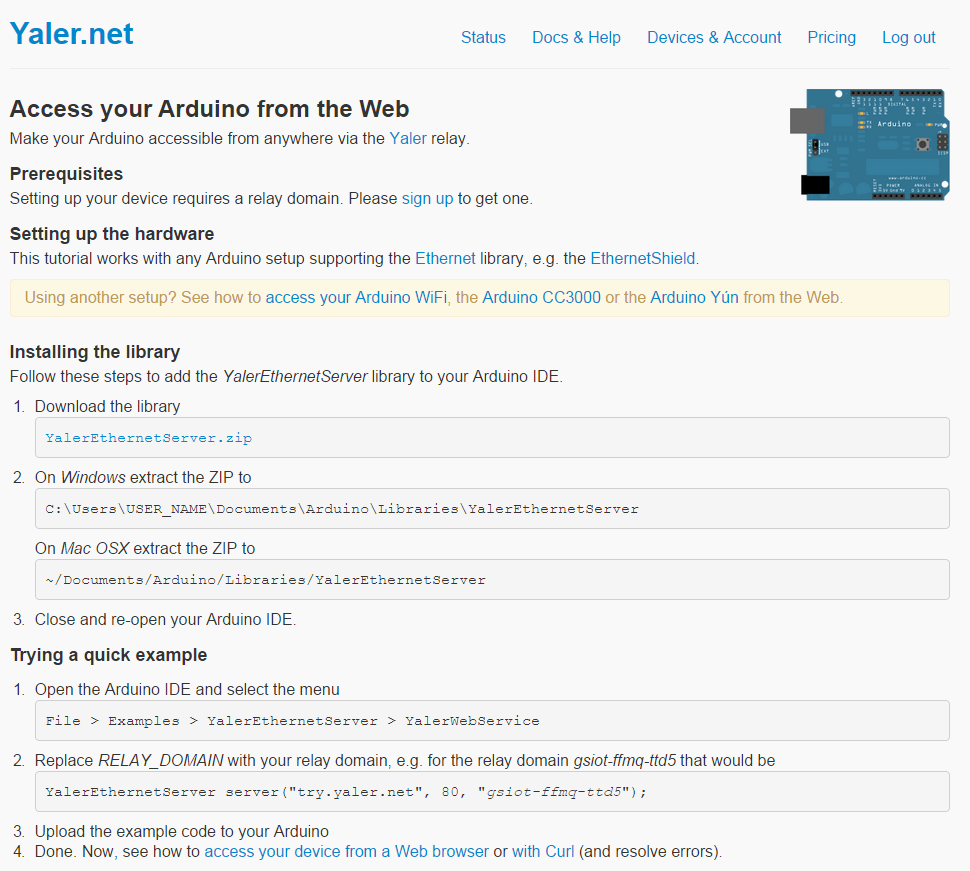
- IDE: IDE.1.5.7,
- Lib : YalerEthernetServer, WIZnet Ethernet Lib. [Lib설치 설명]
- Sketch : WebService.ino
//WebService.ino
// Copyright (c) 2014, Yaler GmbH, Switzerland
// All rights reserved
#include <SPI.h>
#include <Ethernet.h>
#include <YalerEthernetServer.h>
// Enter a MAC address for your controller below.
// Some Ethernet shields have a MAC address printed on a sticker
// Local EthernetServer at http://LOCAL_IP/
// (e.g.http://192.168.0.7/)
#if defined(WIZ550io_WITH_MACADDRESS) // Use assigned MAC address of WIZ550io
; //WIZ550io은 MAC 내장이기 때문에 이부분이 필요없다.
#else
byte mac[] = {0xDE, 0xAD, 0xBE, 0xEF, 0xFE, 0xED};
#endif
// Get a free relay domain at http://yaler.net/ to replace RELAY_DOMAIN below
// Public YalerEthernetServer is accessible athttp://RELAY_DOMAIN.yaler.net/
YalerEthernetServer server(“try.yaler.net”, 80, “RELAY_DOMAIN”);// REALY_DOMAIN 대신 할당받는 Relay Domain을 입력한다.
void setup() { Serial.begin(9600); Serial.println(“Aquiring IP address…”);
#if defined(WIZ550io_WITH_MACADDRESS) // Use assigned MAC address of WIZ550io
if (Ethernet.begin() == 0) {
#else if (Ethernet.begin(mac) == 0) {
#endif
Serial.println(“DHCP failed.”); }
else {
Serial.println(Ethernet.localIP()); server.begin();
}
}
void sendResponse(EthernetClient client) {
client.print(“HTTP/1.1 200 OK\r\n”);
client.print(“Connection: close\r\n”);
client.print(“Content-Length: 5\r\n”); //Hello는 5자라서 Content-Length는 5!
client.print(“\r\n”);
client.print(“Hello”); //이부분이 Http Client 즉 Web brower에 표시되는 부분 위의 Content-Length에 설정된 Length만큼 출력되니 이부분 참고 하여 msg 부분을 수정한다
}
void loop() {
EthernetClient client = server.available();
if (client && client.connected()) {
client.find(“\r\n\r\n”); // Consume incoming request sendResponse(client);
delay(1); // Give the Web browser time to receive the data
client.stop();
}
}
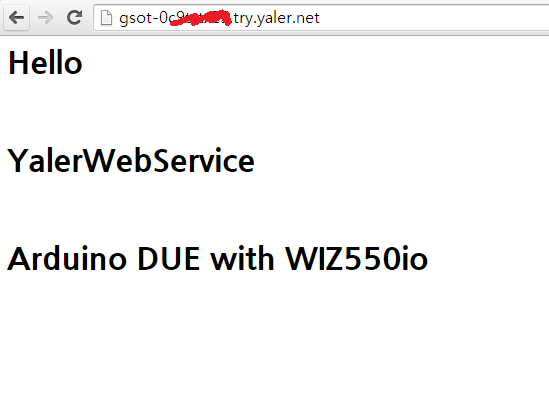
Demo:
Web Client (Chrome)에 URL을 Relay Domain.try.yaler.net형식으로 입력한뒤 Device에 접속하여 message을 받은 모습
— Simple, open and scalable relay infrastructure URL:http://www.slideshare.net/yaler/yaler-wot-v20100325b
— yaler.nt : https://yaler.net
댓글 없음:
댓글 쓰기