2014년 11월 18일 화요일

Note3 - Hello World

ArduinoNote List-page
PREVIOUS: Note2 - Blink sketch

Hand-on #2 : Hello World


-"Hello World" Program을 해보자
-Hand-on #1에서 실습한 Blink Example을 바탕으로 Hello world를 출력하기 위해 UART (Serial)를 극복하자.

Setting Serial Port on Sketch IDE


  • Sketch IDE를 실행한 뒤 메뉴에서 Tools를 클릭하여 아래와 같이 Port를 설정한다.
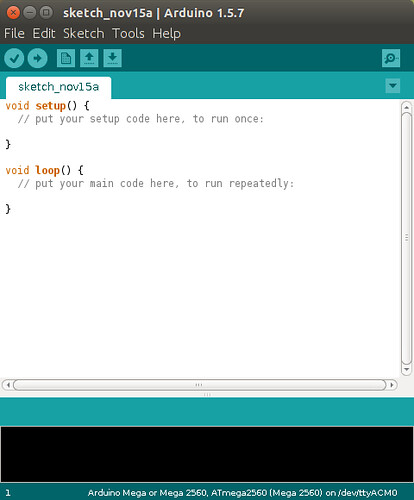
    Go Tools


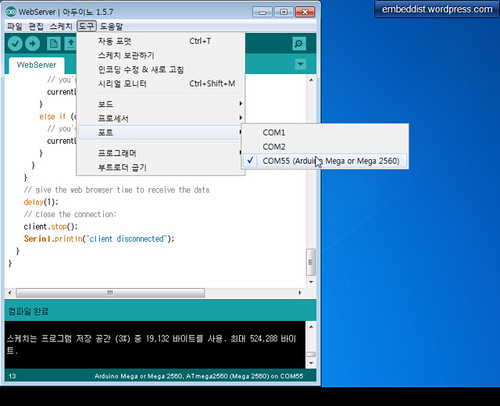
  • Serial Port를 설정한다.


    • OS가 Windows일 경우
      Serial Port

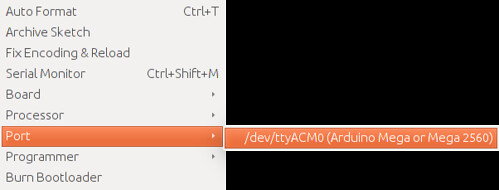
    • OS가 Linux일 경우
      Serial Port


  • Serial monitor의 실행을 위해 오른쪽 상단의 돋보기 아이콘을 클릭
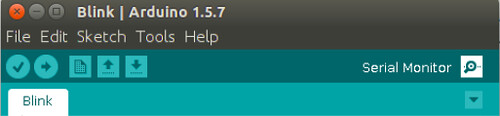
    Serial Monitor


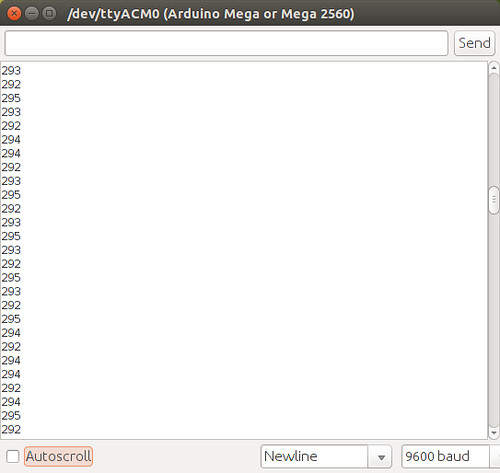
  • Serial monitor 실행모습
    Serial monitor


Skeleton Code based on Blink sketch


[code lang=cpp]
// the setup function runs once when you press reset or power the board
void setup() {
// initialize digital pin 13 as an output.
pinMode(13, OUTPUT);
// Open serial communitaions at 9600 bps (bit per seconds)
// ...insert codes #1...
// print "Blick Example"
// ...insert codes #2...
}

// the loop function runs over and over again forever
void loop() {
// print "Hello World"
// ...insert codes #3...
digitalWrite(13, HIGH); // turn the LED on (HIGH is the voltage level)
delay(1000); // wait for a second
digitalWrite(13, LOW); // turn the LED off by making the voltage LOW
delay(1000); // wait for a second
}
[/code]

Hello World based on Blink sketch


[code lang=cpp]
// the setup function runs once when you press reset or power the board
void setup() {
// initialize digital pin 13 as an output.
pinMode(13, OUTPUT);
// Open serial communitaions at 9600 bps (bit per seconds)
Serial.begin(9600);
// print "Blick Example" or own message
Serial.println("Blick Example");
}

// the loop function runs over and over again forever
void loop() {
Serial.println("Hello World!");
digitalWrite(13, HIGH); // turn the LED on (HIGH is the voltage level)
delay(1000); // wait for a second
digitalWrite(13, LOW); // turn the LED off by making the voltage LOW
delay(1000); // wait for a second
}
[/code]

Compile


  • IDE 메뉴의 스케치>확인/컴파일
    Verify


Program


  • IDE 메뉴의 파일>프로그램어를통해업로드
    Upload


NEXT : Note4 - Ethernet shield

Note2 - Blink sketch

ArduinoNote List-page
PREVIOUS: Note1 - ARDUINO

Hand-on #1 : Blink


-Arduino를 경험해 본다.
-Sketch IDE를 설치, 간단한 Blink Example 따라하기

Preparation Materials


  • Arudino platform : Arduino Mega
    Arduino Mega
    (from http://Arduino.cc)


Arduino Mega

(* form http://duino4projects.com/multiserial-mega-using-arduino/)


Spec. Description
Microcontroller ATmega2560
Operating Voltage 5V
Input Voltage (recommended) 7-12V
Input Voltage (limits) 6-20V
Digital I/O Pins 54 (of which 15 provide PWM output)
Analog Input Pins 16
DC Current per I/O Pin 40 mA
DC Current for 3.3V Pin 50 mA
Flash Memory 256 KB of which 8 KB used by bootloader
SRAM 8 KB
EEPROM 4 KB
Clock Speed 16 MHz


Blink Sketch :


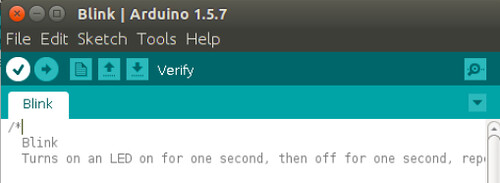
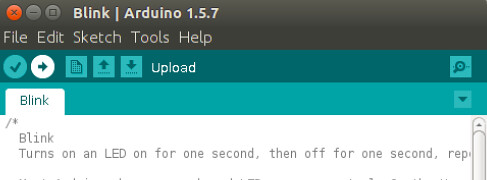
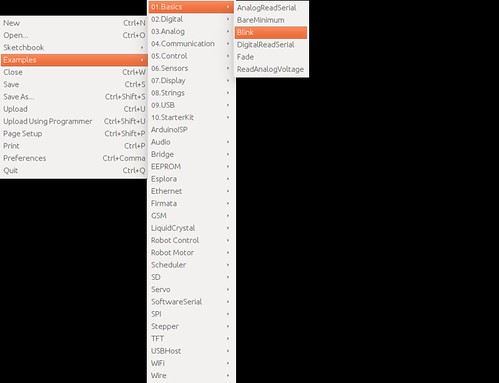
  • Load Blink Sketch : IDE의 파일>예제>Basics>Blink

    Blink example


  • Blink codes

    [code lang=cpp]
    // the setup function runs once when you press reset or power the board
    void setup() {
    // initialize digital pin 13 as an output.
    pinMode(13, OUTPUT);
    }
    // the loop function runs over and over again forever
    void loop() {
    digitalWrite(13, HIGH); // turn the LED on (HIGH is the voltage level)
    delay(1000); // wait for a second
    digitalWrite(13, LOW); // turn the LED off by making the voltage LOW
    delay(1000); // wait for a second
    }
    [/code]


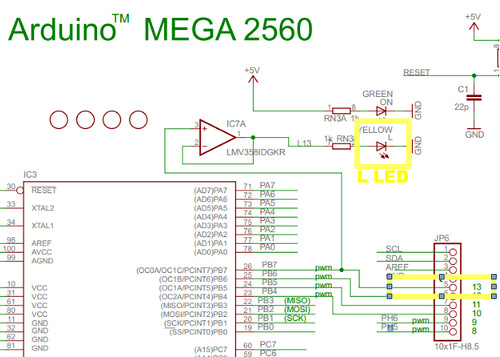
Pin 13 회로도에서 살펴보자


L LED on Schemetic

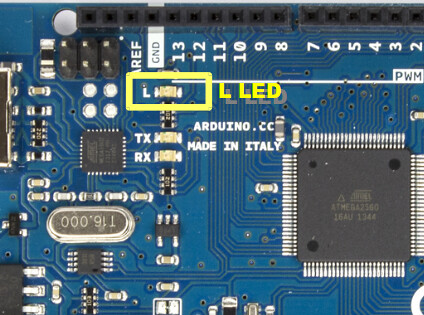
Pin 13으로 L LED를 On/Off 한다.!


L LED on Board

Configuration Platform


  • IDE 메뉴의 도구>보드>Arduino Mega of Arduino Mega 2560
    Selett Serial Port


Compile


  • IDE 메뉴의 스케치>확인/컴파일
    Verify


Program


  • IDE 메뉴의 파일>프로그램어를통해업로드
    Upload


NEXT: Note3 - Hello world

Note1 - Arduino

ArduinoNote List-page

Arduino


Arduino UNO

Arduino는 open-source hardware board를 말한다.


open-source hardware?
open-source hardware는 로 알아보면 아래와 같은 개발에 필요한 Material을
Free로 open하는 open design movement이다. (Free라도 License는 있으니 주의 ^^;)
- mechanical drawings
- schematics
- bills of material
- PCB layout
- Software (driver)


2005년 이탈리아에서 Massimo Banzi를 포함한 5명이 시작한 open-source hardware project이다. 10년이 체한된 지금 59여개의 국가에서 hobbyist, 미술가와 같은 전문지식이 부족한 사람들이 Do-it-Yorrself(DIY)을 할때 주로 쓰이는 대표적인 open-source hardware platform이 되었다. 또한 Arduino Compatible board (아두이노 호환보드), Arduino Shield (Arduino Platform에 plug-in하여 사용할 수 있는 Module), Arduino pin-headers (아두이노 보드의 핀헤더형태), Arduino Clone (Arduino 복제품)와 같은 새로운 단어들이 생겨남과 복잡하고 다양한 Ecosystem를 구축하였다. 최근에는 Intel과 같은 Big업체가 Open-source Hardware에 참여하기 위해 Arduino Certified를 받은 IntelGalileo Board를 출시할 정도이다.
Arduino Team
(*from blog.arduino.cc)

Platform


Arduino는 Sigle-board Microcontroller로 초기에는 8Bit Atmel AVR microcontroller를 시작으로 해서 최근에는 32-Bit Atmel ARM의 microcontroller까지 여러 Platform Board를 계속해서 Release하고 있다.

Evolution of Arduino
(*from blog.arduino.cc)


  • Arduino platforms


    8-Bit MCU 3-Bit IoT 8-Bit EDU 8-Bit Wearable 32-Bit ARM Dev 32-Bit MPU Certified
    UNO BT Esplora Gamma ZERO TRE Galileo x86
    Leonardo Ethernet Robot Lilypad DUE Edison x86
    Mega WiFi
    Xbee/Fio
    GSM
    Yun


Sketch IDE


Arduino의 intergrated development environment (IDE)는 C, C++기반의 Code의 편집이 가능하고, 편집한 Code를 Target Board에 Program할 수 있는 Sketch라고 하는 Software tool을 사용한다. 이 Sketch에는 사용자들의 편의를 위해서 다양한 예제 Code들을 포함하고 있으며 이를software library라고 부르고 있다.

Sketch Library
* Arduino 1.0.x버젼은 8-Bit AVR Microcontroller를 Maintenance함
* Arduino 1.5.x버젼은 최신 Arduino platform을 지원함
* IDE설치 참고 : 네이버 아두이노 교재

Shield


Arduino Shield는 Arduino와 Arduino-compatible board에 plug-in 혹은 Stacking되는 Arduino pin-header를 가진 PCB Circuit를 말한다. 아래의 그림은 Arduino Official Shield이며, Arduino official Shield 이외에도 Display (LCD shield), prototyping (Breadboard)등과 같은 다양한 Shield들이 존재한다.
Arduino Official Shield

Arduino최근 동향


Arduino ZERO : Cortex-M0+ + Debugger


Arduino ZERO

Arduino TRE : TI Cortex-A9 + ATmega32u4 + WEB-IDE


Arduino TRE

ArduinoMateria101 : Arduino 3D priter


ArduinoMateria101

NEXT: Note2 - Blink sketch

2014년 11월 16일 일요일

Hauntbox

Haundbox

What is Hauntbox


The HAUNTBOX is a open source platform which is configured by web browser for haund and some projects.


“It is a system of parts. Sensors and outputs plug into your Hauntbox and it plugs into your network. You tell it what do by using your browser on your computer, iPad or smartphone on your home network with our simple visual interface."


The Hauntbox supports up to 6 intput and outputs and set what voltate they run and their trigger time.
It controls inputs and outputs with no programming, because of configuring them by the web-based.
setting page
Please, refer to this web-page for more details.

Hardware


Haundbox' Specs include:
* 256 KB of flash
* 8 KB SRAM (~4.8 KB free with firmware)
* 4 KB EEPROM
* 7-12V input voltage
* 5/12/24V output options depending on power supply
* Supplies up to 300mA per output (open collector)
* W5100 Ethernet controller (works seamlessly with official Arduino libraries)microSD card slot
* FTDI header pins for firmware hacking/updating
* Easy to use screw terminals accepting up to 18 gauge wire
* Unused header pins for easy expansion via Arduino shields or proto-boards
* LEDs indicating I/O status
* Motion sensor (additional/optional)
* Audio module (additional/optional)

Software


Github : https://github.com/Aylr/theHB

##Related Links
Hounbox had funded on Kickstarter and posted on Atmelcoporation.
- Kickstarter : Easily add sound & automation to your HAUNTS and PROJECTS with this open source prop controller without programming! Arduino compatible
- Atmelcorporation : Automate your props with the ATmega2560 based Hauntbox

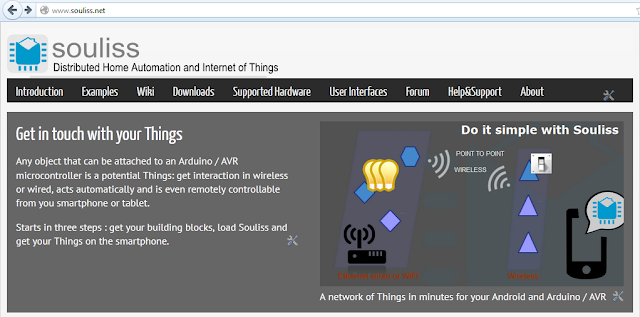
souliss

souliss


Distributed Framework for Home Automation and Internet of Things


What's Souliss?


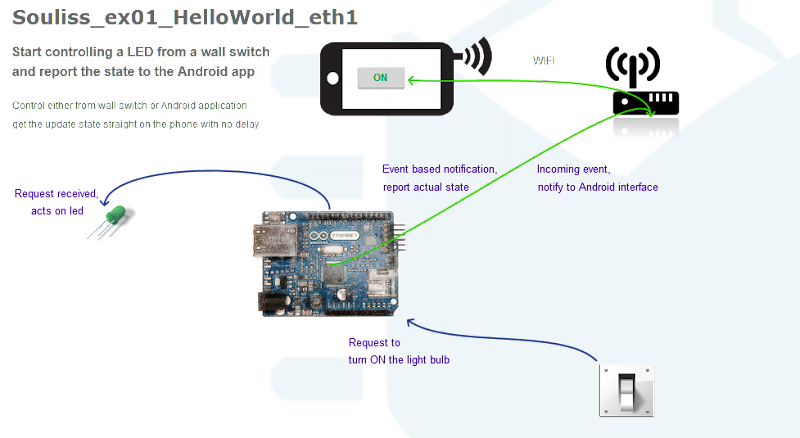
It’s an open source framework which runs over multiple platfoms crossing different the phy layer, as like WiFi, Wireless, and ethernet.

Souliss can not only control and monitor your networked objects, but also share datas and have the trigger-based action from the shared data.

Platform for Souliss


  • Supports Hardware Platform


    • Arduino Boards

    • KMTronic DINo

    • Olimex AVR / OLIMEXINO boards

    • AirQ Network Boards


  • Tranceiver


    • AT86RF230

    • Nordic nRF24L01 and RF24L01+

    • WIZnet W5100 / W5200/ W5500

    • Micodhip ENC28J60


Souliss's Materials


https://code.google.com/p/souliss/

2014년 11월 12일 수요일

Introducing the SmartConnect SAM W25 module for edge nodes IoT applications

SmartConnet SAM W25 is a Atmel WiFi module with standalone MCU

Spark Introduces the Photon, A Wi-fi Microcontroller for $19 | MAKE


spark wifi module


Spark Introduces the Photon, A Wi-fi Microcontroller for $19 | MAKE.

Spark has improved and expanded their product line with the Photon wi-fi development board and a pair of new wireless modules for custom circuit boards. The Photon improves on the popular Spark Core microcontroller by adding 802.11n wi-fi connectivity, SoftAP for provisioning, more memory, and a faster ARM Cortex M3 processor. Like the Core, it sits right into a standard breadboard for easy prototyping. And best of all, it can be had for $19.

Spark expects to start shipping the Photon in March 2015