Developed by the Sweet Pea team, LeoFi is an Arduino-compatible board with an integrated Wi-Fi module.
LeoFi board is built an ATmega32u4MCU and the CC3300 module with the onboard WiFi chip. TI CC3300 module is an wireless network processor which supports IEEE 802.11 b/g and Embedded IPv4 TCP/IP stack.
There are so many cloud-based service platform for Internet of Things. The platform which is cobined by “Arduino + Ethernet shied” is chosen as their reference end-node device. So, I found the list cloud platform which uses Ethernet shield for their device.
#Cloud Service는 이제 Smart phone으로 대표되는 Smart Device만의 전유물리 아닌 #IoT의 화두가 되었습니다.
Xively가 처음 보여주었던 #Visualization은 물론이고 이제는 #Log, #Trigger, #Alert까지 그 기능이 확대되고 있습니다.
쉽게 말씀드리면, IoT Device가 보내온 데이터를 수신한 Cloud Server는 그 데이터를 수신하여 그 데이터를 기반으로 (log) 임의의 설정 값과 비교하여 설정값에서 (Trigger) Twitter같은 SNS와 연동하여 개인에게 메시지를 (Alert)를 보내고 있습니다. 한마디로 IoT / SNS / Cloud 의 장벽이 모호해지고 있습니다.
아래에 리스트된 Could Service업체들은 Arduino Platform이 IoT Device에 가능하면서 Ethernet혹은 WiFi를 가진 업체들입니다. 아래의 업체들도 지원하겠지만, 3G/BLE/Zigbee등을 지원하는 업체까지 포함하면 더욱 많은 업체들이 있습니다.
친근하게 접할 수 있는 OpenHardware Platform인 Arduino에서 Ethernet Shield에 적용한 업체들의 Blog/Github/Website/Forum을 살펴보았습니다.
플랫폼른 점점 가격이 떨어지고 대량생산만들어가면 3D Printer값도 현실적이 되겠네 ㅋㅋ AT90USB: The high-performance, low-power Atmel 8-bit AVR RISC-based microcontroller combines 128KB ISP flash memory with read-while-write capabilities, 4KB EEPROM, 8KB SRAM, 48 general purpose I/O lines, 32 general purpose working registers, real time counter, 4 flexible timer/counters with compare modes and PWM, USART, byte oriented 2-wire serial interface, USB 2.0 low-speed and full-speed device, an 8-channel 10-bit A/D converter with optional differential input stage with programmable gain, programmable watchdog timer with internal oscillator, SPI serial port, JTAG (IEEE 1149.1 compliant) interface for on-chip debugging, and six software selectable power saving modes.
By executing powerful instructions in a single clock cycle, the device achieves throughputs approaching 1 MIPS per MHz, balancing power consumption and processor speed.
#Becky Sten@Adafruit이 최근 #Wearable관련 발표를 OSH2014 Rome에서도 발표했어고 그이에 이 Makefair2014 Rome에서는 Adafuit&Adruino가 Wearable분야에 협력하기로 했었죠. Platform은 #Arduino Gemma! 뭐 그 뒤에는 Atmel!
WINC1500 wireless module *The Arduino Wi-Fi Shield 101 is powered by Atmel’s wireless network controller, part of the Atmel SmartConnect family. It also includes the ATECC108 device, from the CryptoAuthentication family, which allows users to easily incorporate hardware authentication capability in their design.
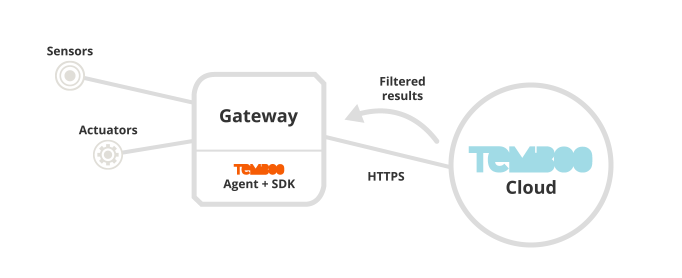
템부(Temboo)는 기업들은 API 관리 전문업체 중 하나이다. 보안 API 접속 서비스는 물론이고 일부는 API 호환 서비스를, 또 일부는 클라우드 기반의 API 접근경로를 제공한다.
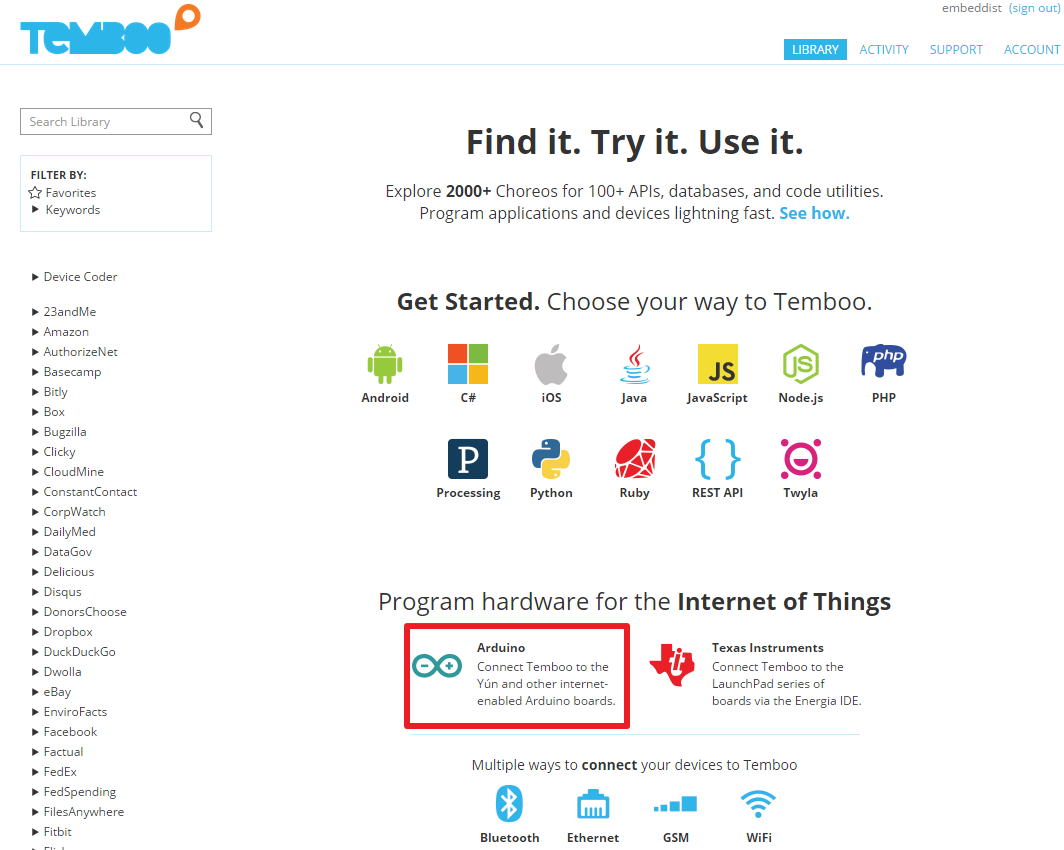
-Program hardware for the Internet of Things
위의 그림처럼 IoT의 hardware 들을 위한 API (Agent+SDK), Cloud service까지 그 영역을 넓혀가는 중이며 Open Hardware의 선두주가 Arduino와 LaunchPad를 중심으로한 Texas Instruments사의 Platform을 현재 지원중이다.
-Select Arduino on Program hardware for the Internet of Things
2. ARDUINO+TEMBOO에서 자신이 사용하려는 Hardware선택
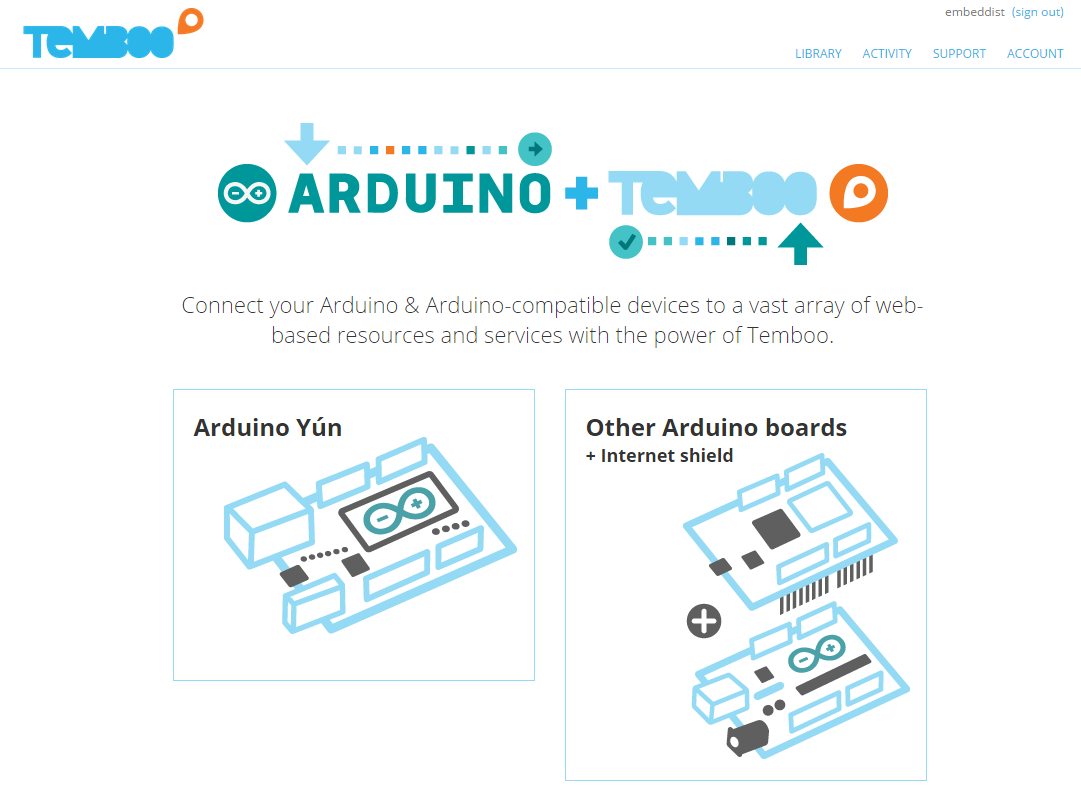
- Select Device: Arduino Yun or Other Arduino Boards + Internet Shield
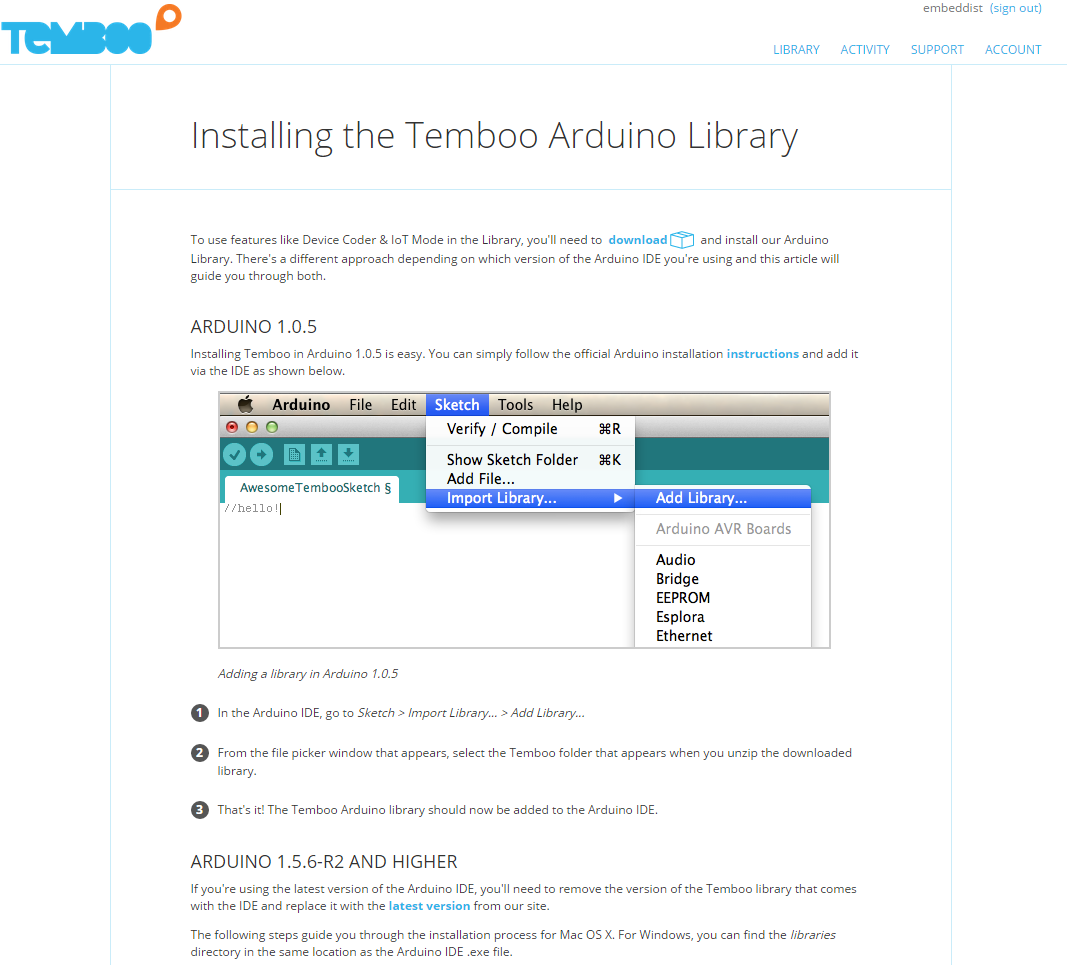
3. 이제 Temboo Arduino Library의 설치를 위해 아래의 그림에서 우측상단의 “Download”클릭
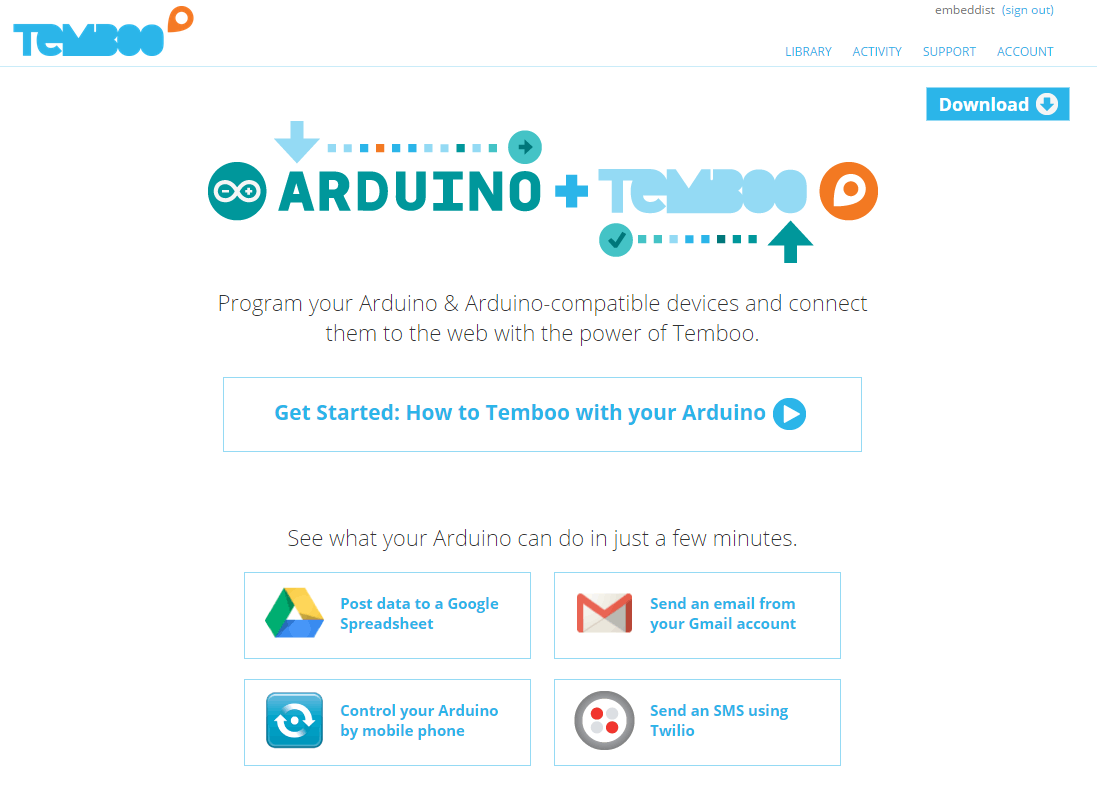
- ARDUINO+TEMBOO
4. Installing에 관한 대용은 아래의 사이트를 참고하며 간단하게 download된 Temboo Arduino Library를 “C:\Program Files\Arduino\libraries” 에 압축을 푼다. IDE1.5.7기준!
- Installing the Temboo Arduino Library
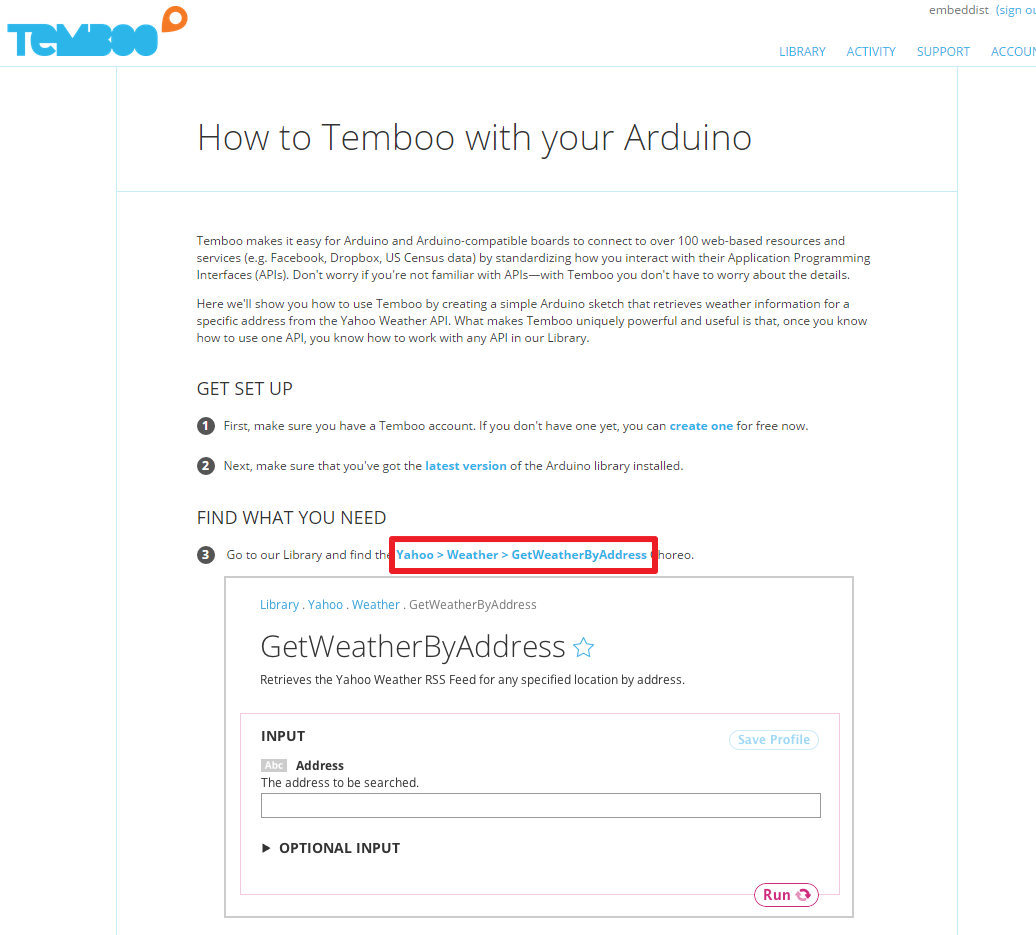
5. 이제 예제를 선택한다 여기서는 GetWeatherByAddress!
- Select GetWeatherByAddress with Temboo Arduino Library
6. 이제 몇가지 설정으로 GetWeatherByAddress.ino를 생성 시키자 -우측상단의 “IoT Mode”를 “ON”으로 활성화 -GetWeatherByAddress란에서 “The address to be searched”밑의 박스에 “Seoul”를 입력 뒤 코드의 생성을 위해 Run을 클릭 -CODE란에 생성된 코드 확인 및 복사
- Configuration and Generation of CODE
7. IDE에서 Compile 및 다운로드 -“C:\Program Files\Arduino\libraries\Temboo\”폴더 밑에 아래와 같이 examples\YahooWeather폴더를 생성한다. -“C:\Program Files\Arduino\libraries\Temboo\examples\YahooWeather”에 복사한 코드를 폴더명과 같은 이름으로 복사한다. - 컴파일 후 다운로드
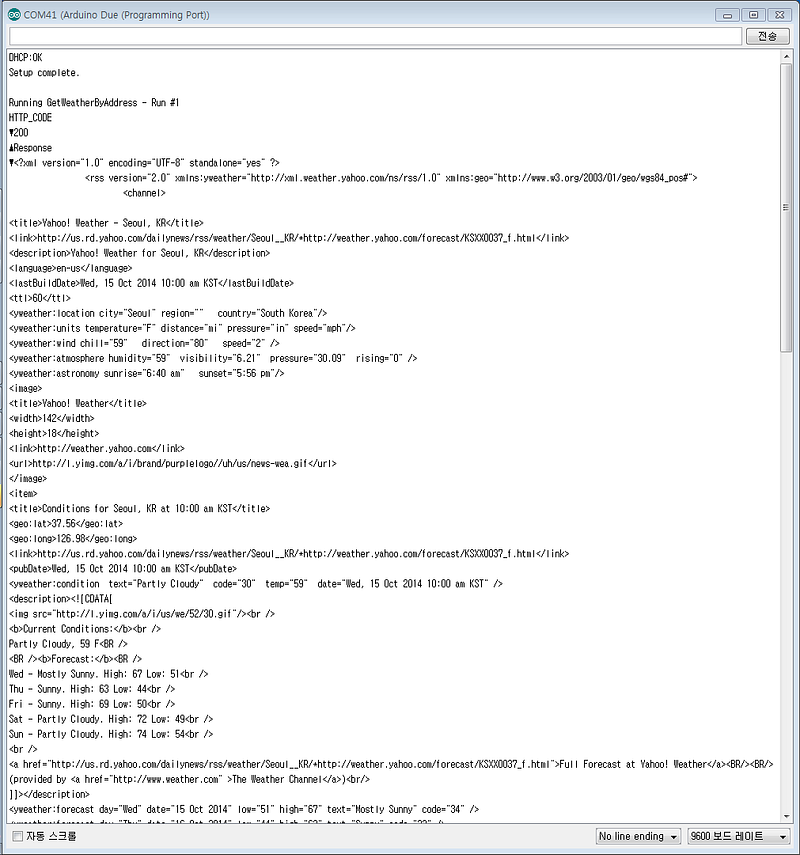
8. Demo: Serial Monitoring 아래와 같이 Seoul의 날씨를 HTTP Get을 통해 해당 웹페이지를 다운받아 Serial로 출력시키는 것을 볼 수 있다.
-Get Seoul Weather http message on Serial Monitoring
최근 많은 Cloud Service들이 Client들이 Device에 접속하기 위해 Device에 바로 접속하는 것이 아니고 이미 등록되어 있는 Server에 접속하여 Device를 제어 및 모니터링 하는 Service들이 다양하게 존재한다. 이러한 경우 Server는 보안 및 네트워크 구성이 다양하며, Device의 경우 Light weight한 구현을 할 수 있고, Clinet도 물론 편리한 UI, Visulaztion등의 이유로 많은 장점을 갖는다.
이번 Posting에서는 Cloud service중 Yaler를 통해 Cloud Service를 경험해보자. ㅋㅋ
Yaler는 embedded system의 접근을 위해 relay infrastructure을 제공한다. relay infrastructure는 control, manage, secure등을 보장한다.
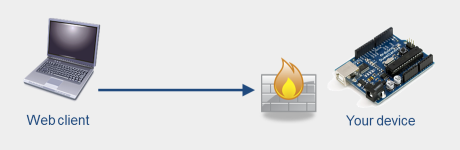
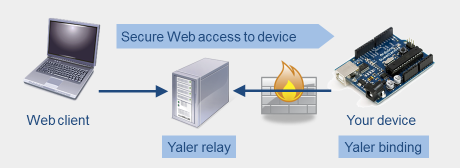
아리의 두그림은 yaler.net에서 relay infrastructure를 설명하는 자료이다. 위의 그림(a)은 Device를 NAT/Farewell 하위에 네트워크를 구성한 경우이며 이때에는 Web client가 Device에 접근하기 위해 Device의 정보이외에도 Network상에서 보안관련 정보나 NAT의 설정등의 정보 및 설정이필요하다. IoT시대에 많은 Device등을 고려한다면 Device정보을 비롯한 접근을 위한 정보까지 관리하는 것은 그렇게 쉽지는 않을 것으로 생각되며Yaler는 그림(b)의 relay infrastructure을 구성하여 Yaler relay라고 불리는 Server를 통해 Device를 접속할 수 있다. Device를 Yaler relay에 binding하여 Device에 대응되는 Relay Host, Relay Domain, Secret Key를 할당받게된다. Web Client 는 이를 이용하여 Device가 아닌 Yaler relay에 접속하게 되며 Yaler relay는 Binding 정보를 이용하여 Device에 접속하는 구조이다.
(a) Firewall, NAT or mobile router prevents access from yaler.net
(b) Relay provides addressability and accessibility from yaler.net
아래의 Yaler이해하기 자료의 slideshare의 자료에서는 Publish HTTP라는 단어로 좀 더 추체적으로 Yaler에 대해 설명되어 있습니다.
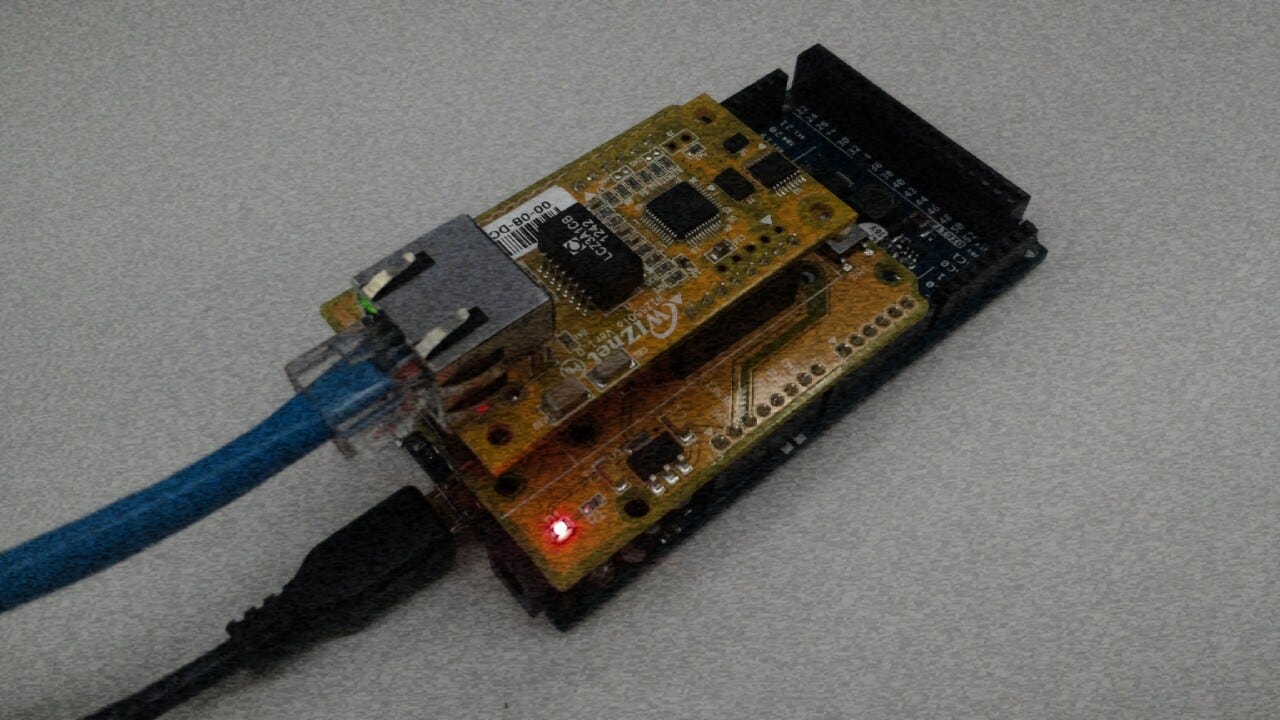
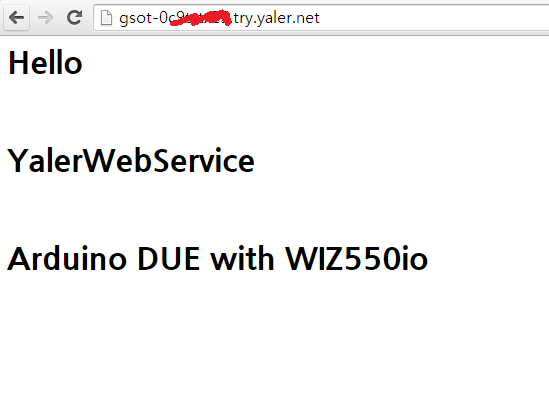
Arduino DUE with WIZ550io
Do Yaler:
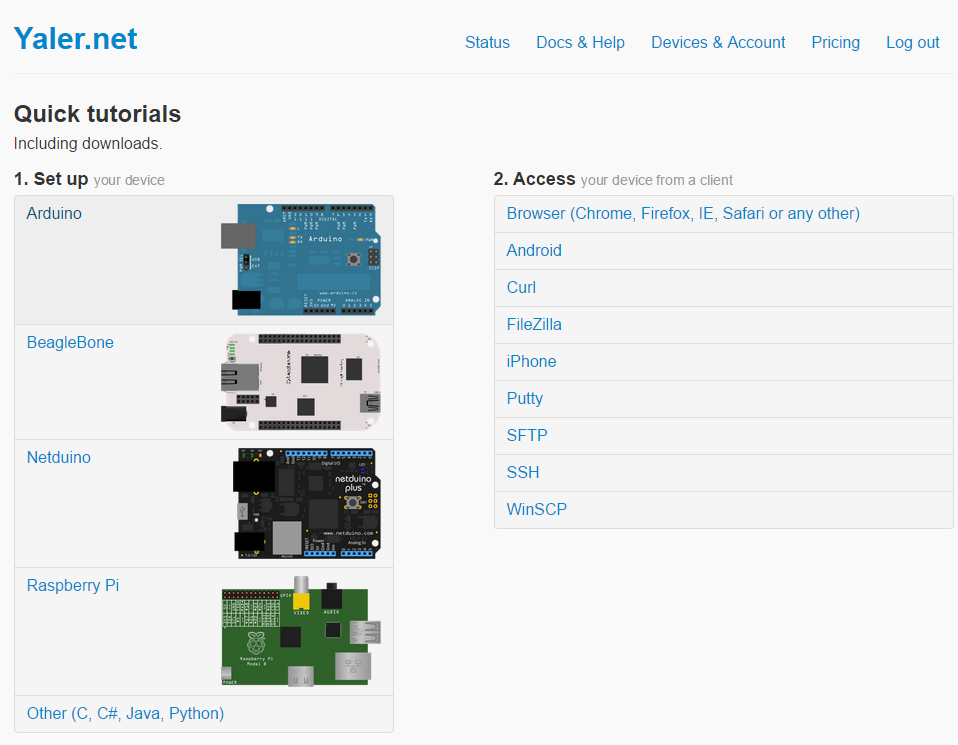
Yaler를 체험하기 위해 필요한 Hardware는 Arduino Board와 Ethernet Shield이다. 그리고 Yaler relay는 yaler.net를 사용하였다
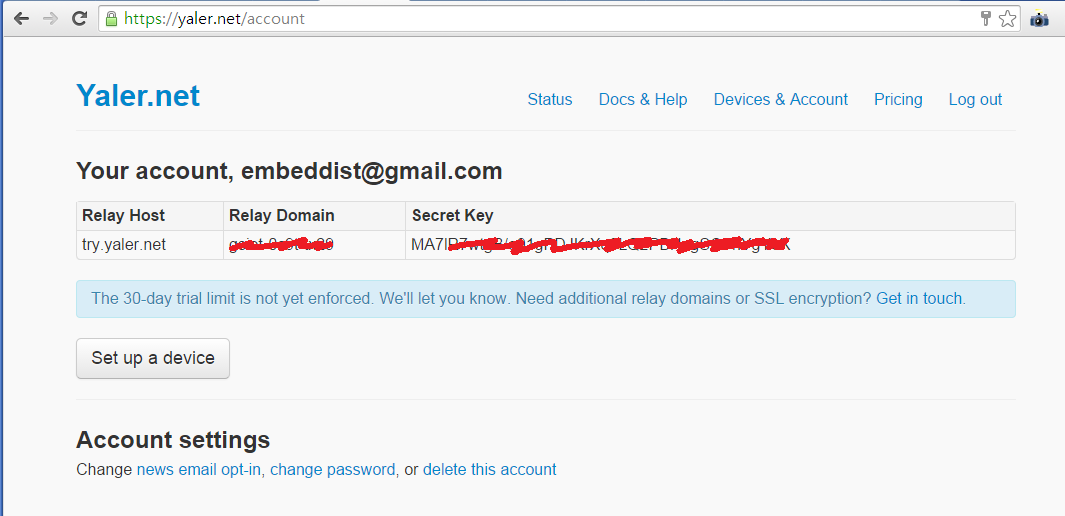
Make account on yaler.net: 무료계정은 한달간 이용할 수 있다. 계정을 만드는 동시에 아래와 같이 Relay Host, Relay Domain, Secret Key을 할당 받는다.
account for yaler.net
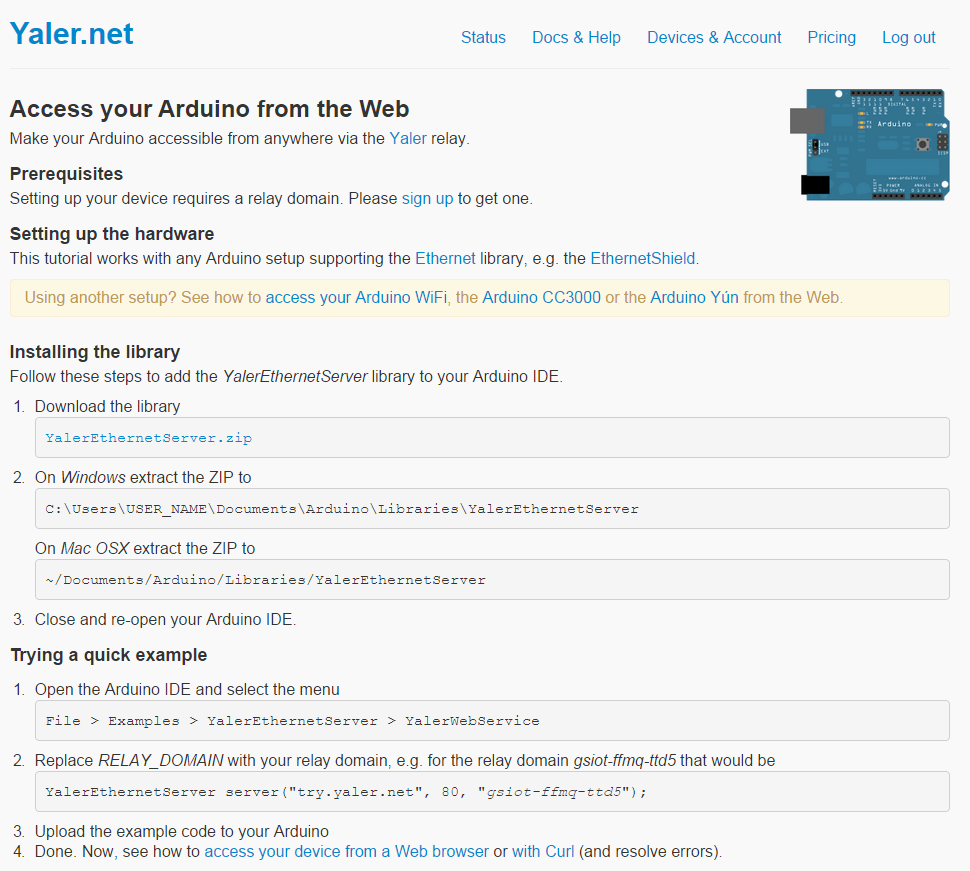
Setting Device : 위의 그림에서 “set up a device” 거침없이 클릭! 아래서 Arduino선택!
Yaler.net Lib.: 위의 단계에서 Arduino를 클릭하면 아래와 같은 페이지가 나온다. 하기의 페이지에 Yaler Lib의 설치 예제까지 나와 있다. 일단 “YalerEthernetServer.zip”를 다운받고 IDE.1.5.7인경우 “C:\Program Files\Arduino\libraries”밑에 압축을 푼다. 그럼 라이브러리 준비 끝.
// Enter a MAC address for your controller below. // Some Ethernet shields have a MAC address printed on a sticker // Local EthernetServer at http://LOCAL_IP/ // (e.g.http://192.168.0.7/) #if defined(WIZ550io_WITH_MACADDRESS) // Use assigned MAC address of WIZ550io ; //WIZ550io은 MAC 내장이기 때문에 이부분이 필요없다. #else byte mac[] = {0xDE, 0xAD, 0xBE, 0xEF, 0xFE, 0xED}; #endif
// Get a free relay domain at http://yaler.net/ to replace RELAY_DOMAIN below // Public YalerEthernetServer is accessible athttp://RELAY_DOMAIN.yaler.net/ YalerEthernetServer server(“try.yaler.net”, 80, “RELAY_DOMAIN”);// REALY_DOMAIN 대신 할당받는 Relay Domain을 입력한다.
void setup() { Serial.begin(9600); Serial.println(“Aquiring IP address…”);
#if defined(WIZ550io_WITH_MACADDRESS) // Use assigned MAC address of WIZ550io
void sendResponse(EthernetClient client) { client.print(“HTTP/1.1 200 OK\r\n”); client.print(“Connection: close\r\n”); client.print(“Content-Length: 5\r\n”); //Hello는 5자라서 Content-Length는 5! client.print(“\r\n”); client.print(“Hello”); //이부분이 Http Client 즉 Web brower에 표시되는 부분 위의 Content-Length에 설정된 Length만큼 출력되니 이부분 참고 하여 msg 부분을 수정한다 }
void loop() { EthernetClient client = server.available(); if (client && client.connected()) { client.find(“\r\n\r\n”); // Consume incoming request sendResponse(client); delay(1); // Give the Web browser time to receive the data client.stop(); } }
Demo: Web Client (Chrome)에 URL을 Relay Domain.try.yaler.net형식으로 입력한뒤 Device에 접속하여 message을 받은 모습